Restoration of a Large Sailing Model, 6
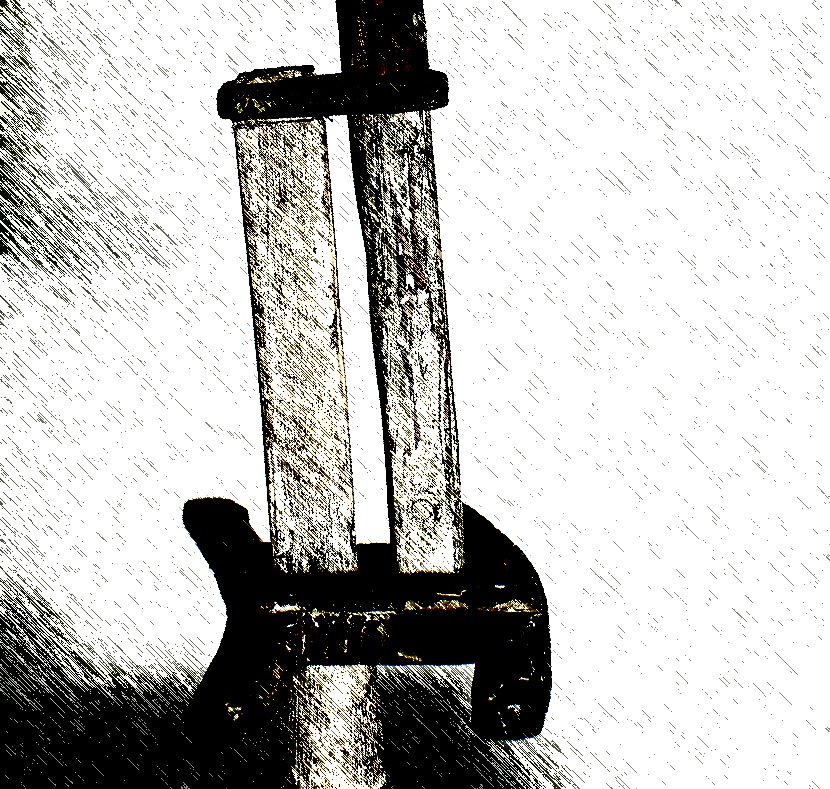
In Part One of this report, I outlined the damage discovered on the MAINMAST. The repair for this mast and the foremast are very similar. After determining how much needed to be cut away, a diagonal scarf was cut into the sound part of the mast. Again, using a piece of oversized pine, I cut a matching scarf joint and glued the pieces together. The process was the same for this as with the foremast. One notable difference was, because the mainmast’s damage was at the deck end, it had belaying pins, jamb cleats and a boom jaw rest attached to it. I managed to remove these from the broken section of the original section of the spar and re-installed them on the mast, once the repair was completed. Here are some photos.
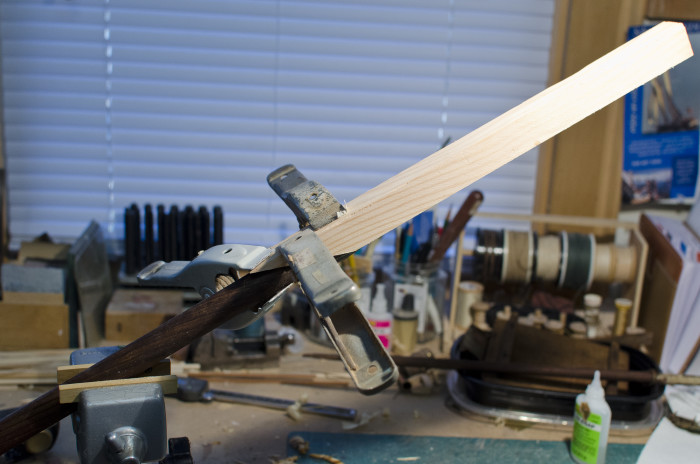
Figure 23 First stage of the repair.
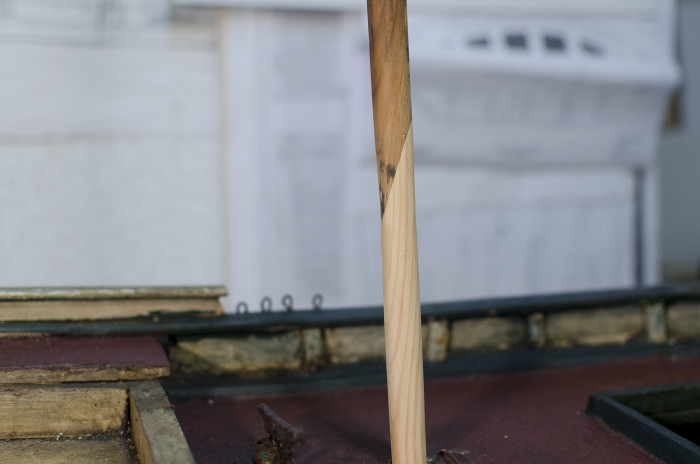
Figure 24 Part Two of the repair.

Figure 25 Mainmast back in one piece.
The masts were now repaired and ready to be re-installed. But, before I actually put them back on the model, I took the opportunity to install the futtock shrouds and topmast shrouds for both masts. It is so much easier to do this while the masts are off the model. Also, any rigging hardware in the form of eyebolts or stay bridles are likewise less troublesome to install when the masts are still free.
I like to use a laser level when installing the masts because it is very easy to see when they are properly aligned. Sadly, this was not possible with this model as the masts were not originally installed on the centerline of the model. They are about 3/32” off to starboard. I tried to get them a bit closer to the center by utilizing the oversized mast holes in the deck. It worked to a small degree, but in the end, it really didn’t make much of a difference.
THE STANDING RIGGING can now begin. The foremast shrouds were first to go on. The forestays and head rigging were next. The main shrouds and the triatic stay came after that. And the last thing to do is install ratlines.
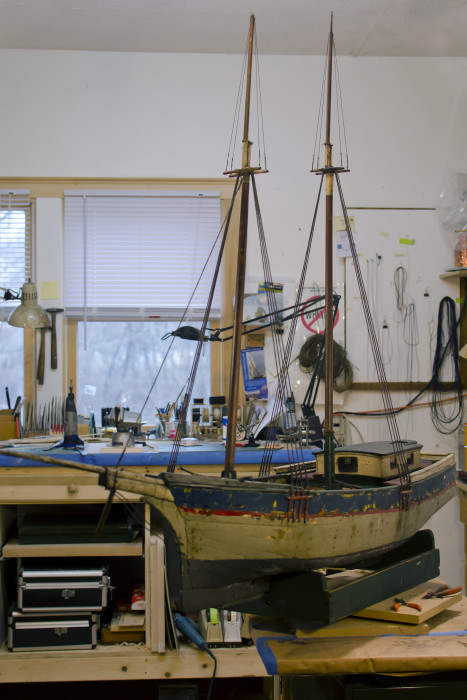
Figure 26 Shrouds and the forestay on the model.
On a schooner, running rigging is fairly straightforward: halyards, sheets and downhauls. On a sailing model it’s even simpler, just halyards and sheets.
In preparation for the RUNNING RIGGING, I made a list of the blocks I would need. I determined the dimensions from my working scale of 1:19. Once the quantities and dimensions were worked out, I used maple and poplar to make the requisite number of single, double and treble blocks.
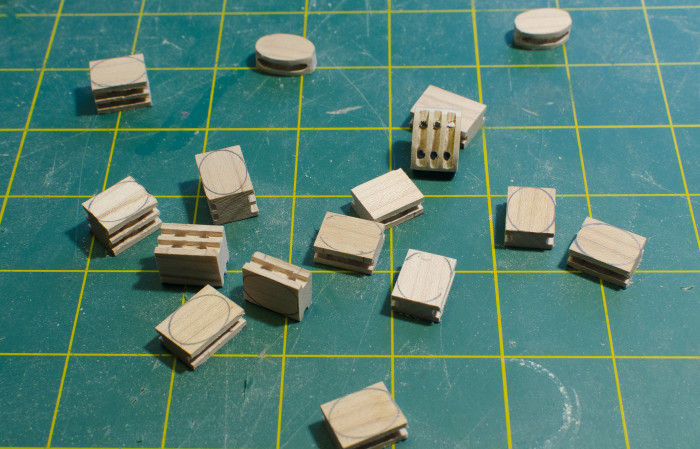
Figure 27 Blocks in varying states of readiness.
As the blocks were finished, I was able to re-install the spars on the model. They were rigged and hoisted to their finished locations. With the booms and gaffs in their proper spots, I could take the measurements for the sails.
As a rough guide to making the sails, I used the sail plan for another schooner from the same period, the Alice S. Wentworth. The Wentworth was built in South Norwalk, Connecticut in 1863, but was completely rebuilt in Wells, Maine in 1904. This puts these two vessels in roughly the same time span, and geographical locale. Because of its regional relationship to this model, the Wentworth’s plans were of much use to me in this project.
After taking all the measurements off the model, I made templates for each sail, using strips of basswood glued together. I made the sails from linen, architect’s linen. After the starch was removed the material was washed and dyed a slightly yellowish-brown color and washed again. It was ironed flat and the sail shapes were transferred by use of the templates.

Figure 13 Sadie’s sail templates.
At this point, THE SAILS are ready to be sewn up. It was time to make a few decisions about how much detail to put on them. Should I put in panel lines and reef points? What about boltropes and cringles? In the end, I decided against these details because I tried to put myself in the position of the original builder and think about what would have been available to me, at the time, and what my goal was. Most old sailing models had/have the simplest of sails. They were usually quickly fabricated from old or purloined bed sheets. Remember, by the time our model shipwright got to this point in the building process, he was probably getting a bit impatient to take his new creation sailing. In the examples I’ve seen of antique sailing models that still had their original “canvas”, most had very plain sails. So, I thought it more fitting to keep them simple. Only simple hems were sewn in around the perimeters.
Before I actually got to making the sails, I had the impression there were not enough mast hoops to accommodate the main and fore sails. However, when it came to install the sails the spacing of the 6 on the foremast and 7 on the mainmast looked right. I was happy not to have to guess how many there might have been, originally.
They are a bit on the tight side. Usually, mast hoops are sized about 20% bigger in diameter than the mast they are going on. These were just barely big enough to do their job, but they do work.
With the sails now on the model, the only thing left to do is coil up the ends of the rigging lines and give the model one last dust and vacuum.
CONCULSION
A large part of what I do as a professional ship model builder is repair work. And the Sadie Morse was a big job. One of the more rewarding aspects doing a large project like this is I find that as I am working on a model, becoming familiar with it. I start to see its strong points and charms, the kinds things not necessarily obvious to the casual observer. The model has a wonderful sheer, not at all exaggerated, as is so often the case with folk models. She was probably built without plans and if there was, indeed, a real schooner named Sadie Morse, then the person who made this model clearly had great affection for that vessel. And if there were no real schooner called Sadie Morse, then maybe he was building the ship he always wanted to see but never did. However she came to be here, it is clear the Sadie Morse was built by a loving hand that took great care to insure we see her best attributes. She is strong, very salty and has a sturdy grace that the best working vessels always seem to possess. A quality that says” I may be working class, but I do it so well.”
MATERIALS USED IN THIS REPAIR
Woods: Pine and maple
Paints and Finishes: Amber shellac, Liqutex artists’ acrylics
Adhesives: Devcon epoxy, Zap-A-Gap cyanoacrylate, Elmer’s white glue
Sail cloth: linen
Rigging line: Linen, Steam tarred linen, steam tarred cotton, silk, cotton
Dyes and Tints: Wood; Behlin aniline dye. Fabric; RIT fabric dye

Leave a Reply