Building the Kate Cory
Hull and Deck Details
Here you’ll find some of the “whys” and “hows” of scratch building this sweet little whaling brig.
The Hull
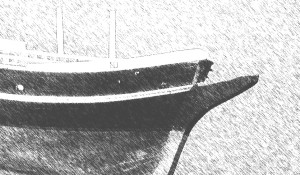
The lines drawing I used for this model had the hull shape drawn to the inside of the planking. Not being a big fan of plank on frame construction, I decided to do a solid core and plank it up to the finished dimensions. I started by making a waterline lift type of core up to the level of the sheer plank (Kate Cory, hull 1). Next, timberheads were added and the break at the quarter deck installed(Kate Cory, hull 2). Finish planking and sheathing came next. You will notice in the photos that there are two distinct patterns for the planking. Above the waterline, the hull is planked much the way you’d expect. But, below it was planked to represent the 1”x12” pine sheathing applied to hulls prior to being coppered. Why bother with this detail, only to have it immediately covered by the copper? Pine sheathing was applied full sized and not spiled, which made it much faster to install. This is true for models, as well. It was also fastened to the hull of the model with much larger treenails than would be practical for the regular planking, further streamlining the process of building the hull out to the finished dimensions (Kate Cory, hull 3). And lastly, copper plates and paint completed the basic hull (Kate Cory, hull 4).
Stern Eagle
I carved the eagle from cherry and it is eight and a half scale feet (21/8”) from wing tip to wing tip, which seems about right for a vessel this size (Kate Cory, Stern Eagle 1). I originally gold leafed the bird, but the effect was overpowering for such a small item. I decided to remove the gilding and replace it with a bronzing powder. The powder is still pretty bright but much less so than the gold leaf (Kate Cory Stern Eagle 2).
Deck Furniture Construction
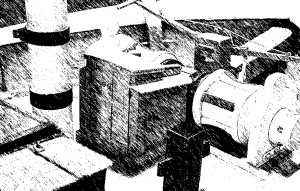
The method for building the deck structures was the same for all (Kate Cory, House). Pictured here, is the Fo’csle companionway. I made the panels for the structure solid, as opposed to beaded panels, mostly because I was not sure that they were beaded (Kate Cory, House 1 and Kate Cory, House 2). It was a common practice of the time, so either method may be right-no way to know for sure. The doors were made using rail and stile construction, much the way the full sized doors would have been built. The rails and stiles are .062” boxwood with a .020” kerf down the middle, into which the door panels (.020” pearwood) were inserted (Kate Cory, House, 3).
Tryworks
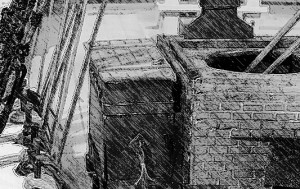
Like the steering wheel, discussed below, the tryworks presented a couple of opportunities for creative problem solving (Kate Cory Tryworks, 4, from forward).
The first was: how to convincingly reproduce the brick work. Commercially produced material was out of the question for two reasons. First, this is a scratch built model and, with very few exceptions, the builder should not be buying anything commercially produced. And second, everything I’d seen looked unconvincing, two dimensional and, well, commercially produced. My answer was to make my bricks out of wood (Kate Cory Tryworks, 1, Brick Sticks). In the first photo, you can see the “brick sticks” being applied in the traditional pattern to the trywork’s form. The mortar lines were kept consistent by using 28 gauge brass wire between the courses as a spacer (just visible at the ends of the courses). After painting and weathering (Kate Cory Tryworks, 2), the “mortar” was laid in. For this I used light weight spackle. It was pushed into the mortar lines and the excess wiped off with a paper towel. When I did this, it left a very slight grayish film over the bricks. This patina gave a bit of age to the bricks (Kate Cory, Tryworks, 3, Mortar and Copper). They now had a worn in look that I find appealing.
The second problem was how to make the trypots, the two large cauldrons held by the tryworks. Each trypot is about 42” in diameter and roughly 25” deep. I decided to make a master, make a mold and cast them. The master was made very quickly and easily from modeling clay. Next, I made the mold from the master then cast the trypots using a two part resin. Sad to say, I didn’t think to take photos of this part of the process, but results are just visible in the finished shots.
Steering Wheel
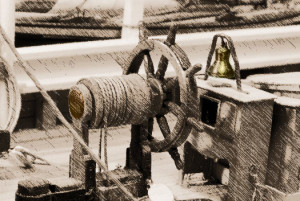
The steering wheel was an aspect of the model that caused a lot of head scratching and blue language (Kate Cory, Wheel and Binnacle). I had never had to make a wooden wheel with turned spokes and was not quite sure how I was going to do it. I found my solution in the Nautical Research Guild’s, “Ship Modeler’s Shop notes II”. On pp 147 148, John Bobbitt outlines his method for making a wooden ship’s wheel ( Wheel 1, Wheel 2, Wheel 3). I adapted his method slightly to suite my need for this model and after only five attempts, I ended up with a passable representation of a “mahogany” steering wheel. The hub and spokes are cherry and all the rim components are pearwood. There are 27 individual parts to the steering wheel, itself, exclusive of the drum and stanchions.
Standing Rigging
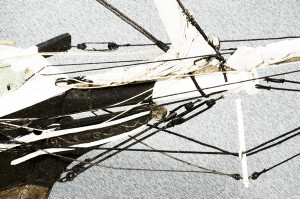
Just about all the standing rigging on this ship had some or all of its length served ( Kate Cory, Fore Shrouds).
There is no worming and parceling on my model, only the serving. It was accomplished with the aid of a serving machine which I made to be attached to my lathe (there are photos of the machine in use in the “Emma C. Berry” gallery). . In this photo, you can see the first shroud is served for its entire length, while the others are served only enough to go round the deadeye and create the doubling.
Blocks
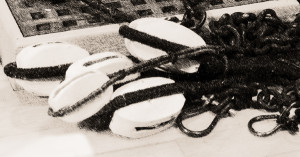
Blocks were made from either boxwood or white holly and stropped with brass or copper wire that I ran through a rolling mill to flatten. This photo shows the steps in the process (Kate Cory, Blocks for Notes).
Rigging Hardware
All the rigging hardware I made from scratch. The making of the blocks I outlined earlier. The deadeyes, hearts and fairleads are made from ebony (old piano keys). The shackles, split rings, eyebolts, thimbles and block straps are made from brass or copper wire (Kate Cory, Jib Halyard Block).
Sails and Spars
: Here is the TopGal’nt yard and sail. It is typical of all the spars and sails on the model (Kate Cory, T’G’lnt Sail, Kate Cory, T’G’lnt Sail, aft side and Kate Cory T’G’lnt Sail, close up).
The spars were made from either boxwood or maple. All the jackstays were made from boxwood. I elected to leave off the studding sail booms and their associated hardware. If I were working at a larger scale perhaps I would have included them. But at this scale, I think their inclusion would have been visually excessive. Also, it was not know for certain that Kate Cory actually carried them.
The sails are made from a special paper call silkspan. It is a very thin and very strong for its weight. And best of all, it stands up to water, an absolute necessity when making furled sails (Kate Cory, Two Lower Yards). It can also be painted or worked into various shapes when put over a form and moistened.
Scale patterns were made for each sail with tabling, panel lines and attachment points for the sail handling lines all marked out. The pattern was transferred to the silkspan, which had been given a thin coat of acrylic paint to make it look more like canvas. All the details were then glued on or penciled in, as needed.
